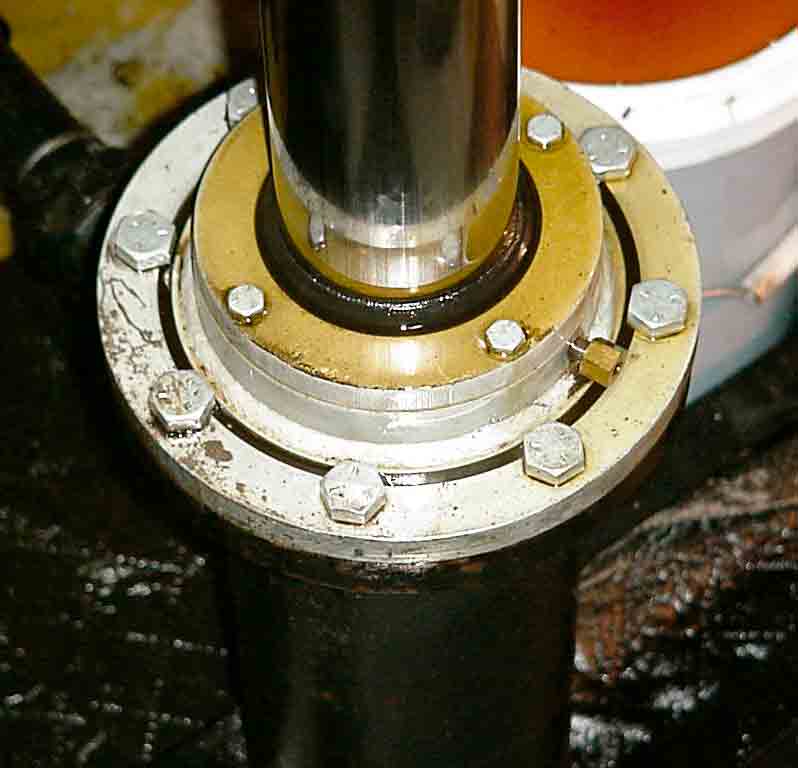
Your author provides an in-depth look at maintaining and troubleshooting packing for hydraulic elevators.
The Texacone Co. has been supplying the elevator industry with hydraulic seal sets for more than 50 years. During this time, we have compiled information that can be vital in determining the correct replacement seal set for a specific application and root out the cause of sealing performance issues. This article provides essential information required to properly repack a hydraulic elevator unit.
The science of dynamic seal design can be quite involved. Here, however, we omit the detailed engineering principles behind the seal profile geometry and material selection, instead focusing on a more practical, hands-on approach that can save time and money.
Background
The neverending demand for more environmentally friendly and efficient machines has required many changes. The goal is for them to do more work at a lower operating cost, require less maintenance and provide greater safety. For the hydraulic-elevator industry, there has been an increase in the use of holeless units that also include above-ground tandem, cantilevered, roped hydros and telescopics. Environmental code changes have led to stricter requirements for PVC liners for in-ground cylinders.
These changes explain the need for higher performance standards from the system components because of:
- Lower speeds: Roped and telescopic units have dramatically reduced operating and leveling speeds.
- Higher temperatures: PVC-lined and above-ground holeless cylinders no longer have direct contact with the ground and are surrounded by an insulating blanket of air. Generated heat will not dissipate as efficiently as before. Smaller machine-room space allowances also increase overall system temperature.
Because of these recent industry trends, demand for improved sealing components has greatly increased in the past decade and will probably continue to do so.
Basics
The mechanics of a hydraulic system are relatively simple. A cylinder is filled with fluid. Under pressure, the fluid forces the plunger out of the cylinder. The seal forms a barrier to block the passage of the fluid, generating system pressure.
Typically, the words, “packing” and “seals” are used interchangeably, which can lead to confusion. Technically, packing refers to the entire set of components, which will always include one or several types of seals. Other components may be a wiper, spacers and bearings. See the graphic below for specifics on individual component functions. Packing can also refer to older compression-style packing still widely used today.
Cylinder Head ID
Even before going to the jobsite or ordering parts, it is vital to gather as much information as possible about the unit to be repacked. Information that must be collected includes plunger size, unit manufacturer and configuration of the installation.
Additional information that could prove helpful includes date of unit installation, modifications done to the unit since, history of performance problems, types of seals previously installed and date of last repack. To minimize elevator downtime and technician travel time, it is best to purchase seal components before traveling to the site. Once there, it is best to confirm as much information as possible before taking the unit offline. This will avoid costly downtime should the on-hand seal set be incorrect and new parts need to be reordered.
Plunger Size
The plunger diameter should be measured with a caliper or tape and should be done in several locations from top to bottom. We recommend using a diameter tape (such as PI TAPE®) to eliminate the need for any calculations. Note any variations in readings. Pay special attention to areas at the plunger ends and around joints, as these are common areas for dimensional variances.
It is important to note that the correct machined dimension of a 5-in. plunger can vary as much as .06 in., depending on the manufacturer. We recommend using a seal specifically engineered for that manufacturer, rather than a standard seal.
Unit Manufacturer
Equipment modernizations typically include the power units and controllers, leaving the existing hydraulic jack in place. There are many older cylinder heads still in operation, making it more difficult to identify the jack. Compare the head with any available drawings or prints to confirm the manufacturer and model of the hydraulic cylinder. Note that often, the OEM of different components can vary.
We offer four options to make this process easier:
- Compare to the 3D pictures found in our catalog and Technicians Handbook.
- Access the interactive Elevator Cylinder Head ID Tool at texacone.com/IECHI.
- Download the Texacone On-Site App.
- Send a photo to [email protected] for expert advice.
Configuration
Finally, confirm the configuration of the installation. Seal selection is often dictated by type. For example, roped hydros typically require a single seal and have a higher potential for “stiction” (sticking friction felt when motion starts). This would be a good application for a low friction seal, such as Texacone’s 900 Supreme Green series urethane seal. Another example would be two-seal in-ground units. It is important to maintain the integrity of the OEM set design requirements by having two seals in the packing set while not causing undue friction. This is an application suited for a reduced-friction packing set, in which the oil return system can still be maintained.
Unit Inspection
Once the information has been confirmed, the hydraulic cylinder should be monitored for operational conditions before being taken offline. Potential seal-related problems to look for are:
- Leakage
- Ride performance
- Oil condition
- Plunger condition
It is important to observe the position or condition when the above problems manifest themselves. For example, does the problem occur at the second landing, while the car is in the down direction and as the plunger’s joint passes through the packing box?
Leakage
Determine where the leakage originates. Does it appear uniformly or erratically at a specific position? Does the oil squirt out, or does the plunger have a heavy film of oil when traveling upward? Also, inspect the box for external leaks that may be coming from a gasket or O-ring failure.
Ride Performance
Observe where the problems occur. Is there bumping just as the plunger begins to move from rest? Does the problem occur primarily at the top floors, bottom floors or both? Note the severity of the problem.
Next, try a diagnostic procedure that we use to determine the source of excessive friction. While the unit is online, smear a thin coat of Jack’s Green Slime or equivalent lubricant on a significant portion of the plunger. Now, run the unit and observe any changes. If the ride performance issue is eliminated, the friction source is likely originating from the seal. If the issue changes only marginally (or not at all), the most likely source is either the guide rings in the packing box or an external source, such as the rail-guide system or hydraulic valve.
Oil Condition
Inspect the hydraulic oil for signs of degradation, such as discoloration, strong odors or contamination. Usually, a visual test is adequate to detect any problems with the oil that could affect the seal. For example, milky oil is evidence of water contamination, while a significantly dark color indicates degradation. Note that increased system temperatures accelerate degradation and can further decrease the lubricity critical to achieving optimal ride performance. The oil should be replaced if it has indications of degradation or contamination, as this will significantly affect seal performance and longevity.
Plunger Condition
Finally, before removing the packing components, thoroughly inspect the entire length of the plunger for scores or pits, bad joints, poor grind patterns and discoloration.
Packing Set Inspection
Remove the packing-set components from the cylinder head. Consult the manufacturer’s manual for the proper procedure and observe all safety precautions. When removing the components, mark their positions relative to the plunger. This will aid later when determining the exact position of a defect on the plunger, if necessary. Remove the components carefully, trying to preserve any wear marks or indications of failure.
Avoid using a sharp metal object like a screwdriver that can damage the plunger or stuffing box. Kits with special tools that allow easy packing removal without damaging the other hydraulic components are available. Also, determine if any components are missing from the packing box.
Examine all components from the packing box. Note any findings on the individual components, such as:
- Deep scores or scratches
- Uniformity of the wear on sealing lip or wear surface
- Deformations of the components
- Hardening or discoloration of materials
- Cracks or missing portions of components
- Packing Alternatives for Extreme Conditions
If the unit is experiencing extreme conditions, consider using an alternative packing type and/or material to extend the life of the seal. See chart at top right.
Methods for Corrective Action
If needed, use the “Cause and Effect” chart at center right to determine if there is a solution to help bring damaged equipment back to acceptable working condition.
Glossary of Causes
Plunger scores and scratches: Raised, scored areas must be dressed down flush to the plunger surface. Shallow scratches can be sanded down with sandpaper to minimize seal damage. Wrapping an old pair of nylon stockings or pantyhose around the plunger is an excellent way to detect small burrs on the plunger when refinishing one. It is important to maintain a true diameter without creating flat spots. We recommend using a sanding sleeve or other concentric sanding device that can uniformly refinish the entire plunger.
Deep scores should be filled to eliminate excessive seal leakage. Epoxy-type fillers are generally temporary and should be avoided, as the oil pressure will pop out the repair over time. We recommend using the Sure Fill repair kit that employs a permanent solder-based filler and will last the life of the plunger. The only other alternative for deep scoring is to replace the plunger.
Poor plunger finish: In the elevator industry, a plunger should be neither too smooth nor too rough. If the plunger becomes glazed or polished to the point of being very smooth, after several years of service, it must be refinished. Highly polished surfaces can cause ride-performance problems due to the inability of the surface to carry lubricating oil through the seal. Typically, a very dry plunger is the result.
Rough plungers will usually carry an excessive amount of lubricating oil, as well as dramatically decrease seal service life. In either case, the plunger should be refinished to bring it back to the manufacturer’s specifications. Texacone’s Sanding Sleeve will work perfectly in both of these situations to renew the plunger’s surface finish to OEM specifications.
Dimensional variations: Plunger dimensions are the most common variation and can be from over/under grinding, tapered grinding or excessive grinding on a repair spot, such as a joint. Sometimes, a plunger is “hourglassed,” meaning it has several low spots over its length. Often, the Sure Fill Repair Kit can be utilized to fill a low spot to bring it to the original plunger dimension.
Packing box dimensions are harder to measure but, fortunately, do not typically have dimensional problems. The box will have to be removed to take accurate readings. Dimensional information is available from most manufacturers. It is rare, but if a box is out of spec, it may have to be replaced.
Undersized/oversized plungers: If a plunger is suspected of being an incorrect dimension over the entire length, take several measurements with a diameter tape. There is dimensional information available for most OEMs, and it can be determined if the plunger is out of tolerance. In most cases, there are special seals available, such as the LOADED 900 Seal for leaking units.
Mismatched plunger joint: If a joint has a mismatch between two sections, it must be redressed so that there is a smooth transition from one section to another. Texacone’s Sanding Sleeve can be used to smooth the joint, while the Sure Fill Repair Kit is used to fill low spots around it, particularly if there is any grinding involved.
Cylinder misalignment: Incorrect alignment can cause both leakage and friction. To obtain optimal seal performance, alignment must be within spec. All kinds of “spider bobs” have been used to help accomplish this. We recommend using an aligning system that will quickly and accurately align cylinders consistently. Selecting a seal that has a wider sealing range can also be a solution to this problem.
Temperature extremes: Very low temperatures can cause abnormal leakage, while temperatures higher than 140˚F can cause seal friction and shorten seal life. Note the temperature measured in the oil tank is typically lower than the temperature measured near the seal where there is dynamic movement. Oil heaters and coolers should be employed to maintain temperatures. Specific seal materials can also be chosen to handle these extremes, such as Viton®, hydrogenated nitrile or the newer premium grades of urethanes, like what is found in the Texacone 900 series seal, which performs up to 300˚F.
Oil degradation/contamination: Replacement is often the most effective way to correct contaminated or deteriorated oil. When replacing the oil, use a filter element with a minimum rating of 10 microns. Also, be sure the entire system (including the cylinder) is filtered. In addition to replacement, it is also important to determine the root cause of the deterioration, whether from temperature extremes or introduction of foreign debris. To help improve the existing oil, additives are available to add lubricity to the oil and help reduce ride-performance problems. Be sure these additives are completely compatible with all the sealing components in the system, including the valve system. Other seal materials, such as Viton, are available if oil replacement is not an option.
Incorrect parts: After the sealing set components are removed from the stuffing box, compare them to the new replacement set. Be sure that you have all components necessary to replace the entire set. Also, confirm the part numbers and given dimensions match the unit’s requirements. Consult Texacone’s online catalog, texacone.com/IECHI, for the most current part numbers necessary for specific North American units.
Repacking
If the cylinder unit is in good repair and set up according to specifications, it is time to install the packing set. The packing box must be very clean and completely void of any burrs. Remove any sharp edges on the box that may damage the seal components upon installation. Clean all grooves and bores thoroughly before installing new seals and components. In the case of split wear band grooves, this is very critical, as any debris in the grooves will decrease clearances and cause ride-performance problems. Also, inspect the top of the plunger for a lead-in chamfer. This chamfer must be present to avoid damage to the seal when placed over the plunger.
There are two types of packing sets available for hydraulic cylinders. The compression type (Vee or Chevron) must be compressed by a gland for proper operation. The floating type should not be compressed and have a minimum of a 1/32-in. space in the box for floating. Floating sets that are compressed can result in either excessive leakage or friction.
Confirm that the type of packing set you have matches the type required for the unit. Also, confirm that when the set components are installed, there is ample compression or space, depending on which is required by the set type. Occasionally, in the case of compression packing sets, shims are required to provide enough compression for sealing. It is important to install the component pieces in the correct sequence as packaged or as shown in the catalog. For example, there should always be a lantern between two seals.
Get more of Elevator World. Sign up for our free e-newsletter.


