Still, faulty operation in elevators must always be recognized as a possibility

Value: 1 contact hour (0.1 CEU)
This article is approved for Continuing Education by NAEC for CET® and CAT®.
EW Continuing Education is currently approved in the following states: AL, AR, FL, GA, IL, IN, KY, MD, MO, MS, MT, OK, PA, VA, VT, WV and WI. Please check for specific course verificationof approval at www.elevatorbooks.com.
Learning Objectives
- After reading this article, you should have learned:
- Definition and characteristics of printed circuit boards
- Role of printed circuit boards in elevator controls
- How printed circuit boards are manufactured
- Diagnosing printed circuit boards in the motion controller
- Printed circuit board repair (Leave it to the manufacturer.)
Printed circuit boards — those flat cards consisting of components and wiring traces built onto a rigid substrate — are ubiquitous in today’s electronic equipment. They are user-friendly, inexpensive to manufacture and reliable, but in the fullness of time, faulty operation is a possibility. When this happens in an elevator installation, the system typically recognizes the problem and instantly shuts down. The car may stop at the next floor and fail to restart until the problem is resolved or, in a more critical case, power to the motor is interrupted and, without continuous power, the brake is applied. If the outage is lengthy, a passenger extraction is required.
In the popular imagination, when an elevator system fails, the car falls to the bottom of the hoistway with a devastating outcome. In actuality, however, since Elisha Graves Otis invented elevator safeties in 1854, that doesn’t happen. In the event of rope failure, safety dogs engage upward-angled rack teeth, locking the car in place and preventing it from falling.
A far more common occurrence is a door malfunction. The elevator system is designed to prevent the car from moving if any one of the doors is not closed and securely locked, except for when the elevator is in inspection mode. This is a very basic safety feature for obvious reasons. And this is not infrequently invoked: because of the many doors in even a low-rise installation, a minor fault can prevent the lock from fully engaging or can prevent the door sensor from properly interacting with the motion controller. In addition to mechanical wear of the door lock, which may be required to function hundreds of times per day, a door-fault electrical signal can originate in the motion controller. This can be in a printed circuit board, which consists of a lot of complex circuit traces and components, in addition to one or more terminal strips on which are landed larger wires connected to the many sensors, actuators and annunciators that are located throughout the installation.
Printed circuit boards appeared in the first decade of the 20th century. Albert Hanson, in Germany in 1903, laminated flat foil conductors to multi-layered insulating boards. Thomas Edison in 1904 used chemical means to plate conductors onto linen paper. In England, Arthur Berry developed the first print-and-etch technology. In the United States, Max Schoop flame-sprayed conductive metal through a template onto a board. Charles Ducas electroplated circuit patterns. These people were all trying to improve upon point-to-point wiring.
By 1936, in England, Paul Eisler built radios containing printed circuits. In 1943, as part of the war effort, more advanced printed circuits were used in proximity sensors, an innovation that was offered to the public in 1948 and played a role in the post-war electronics boom. Then, in 1952, Motorola introduced plated circuits for use in home radios. Throughout the 1960s, printed circuit boards replaced point-to-point wiring as the dominant method for connecting components in home appliances, as well as industrial applications.
Today, many manufacturers do not advocate component-level repair of printed circuit boards. The entire board is discarded and replaced with a new unit, a procedure that is economically efficient but results in e-waste, often because of a burnt resistor.
I’ll discuss methods for troubleshooting and repairing circuit boards, but first, some cautionary notes. We ordinarily think of elevator safety interlocks as highly reliable mechanisms that instantly trip out and stop the elevator in the event of any critical failure. This is generally true, but there is the potential for simultaneous failure of redundant systems, as well as inadvertent introduction of a fault that could surface in the future.
As an example, there was one extremely rare but tragic fatality a few years ago when a child was caught in an open door. A lengthy investigation revealed the cause: In the course of a circuit board replacement, a technician had reversed two adjacent wires in a terminal strip, disabling the door interlock. The problem did not emerge until that particular door lock failed to engage, at which point the elevator continued to run. Knowledge and technical expertise plus constant vigilance are essential, but that is not the whole story. Momentary distraction or inattention to a small detail can have unforeseen consequences. This is particularly true in circuit board work, where even a simple replacement can introduce an invisible fault.
Before the widespread use of printed circuit boards in the 1960s, electrical components were mounted and electrically connected by point-to-point wiring on a metal chassis. Of course, there are many elevators with this kind of technology still in service. But the printed circuit board revolution was sudden and irreversible, and there will be no going back. The problem with chassis-based point-to-point wiring was that the circuits were large, heavy and sensitive to vibration, while circuit boards were quickly found to be durable, efficient and less expensive.
There are two principal printed circuit board types. The older variety, “through-hole construction,” dominated the industry from the 1950s until almost 1990. The tracks on printed circuit boards were printed first on one side only, but since the development of multilayer boards, tracks are printed on both side of boards where needed. To make electrical contact between the two outer layers, plated through-holes have to penetrate all intermediate boards, which limits options regarding circuit layout. Despite other disadvantages, including the accurate placement of holes and rapid wear and breakage of ultra-thin drill bits, through-hole technology was a viable means of mounting and electrically connecting discrete components. It remained in use for 30 years and is still used despite the current dominance of surface-mount technology, with its own set of advantages and tradeoffs.
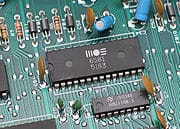
Components intended for use in a through-hole circuit board are supplied with relatively long leads. During manufacture, these leads are bent as needed and pushed through pre-drilled holes in the circuit board. The board is then flipped over and the leads are trimmed, leaving enough wire to be soldered to the conductive trace, which remains after an etching process has removed conductive metal between adjacent conductive paths. Then, manually for small runs or in a single automated process for large production runs, all connections are soldered. A widely used automated process is wave soldering, where the circuit board is suspended, solder side down, a short distance above a pool of molten solder that is agitated slightly to create a wave, which travels the length of the board applying solder to the pre-fluxed joints. The process is simple and less expensive than it sounds. Success depends upon precise control of the solder temperature and height of the wave.
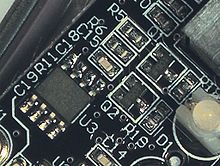
Components intended for use in surface-mount technology are supplied by the manufacturer with small metal pads or endcaps to be soldered directly to the surface of the circuit boards, rather than the wire leads used for through-hole installations.
Through-hole and surface-mount components can be used in the same board. Surface mount is preferred because the cost of precision drilling is eliminated, but through-hole is used where components are too large for surface mounting, or where mechanical stress could move the component, thereby pulling the trace off the printed circuit board.
Circuit boards are often produced in layers consisting of multiple conductive and non-conductive sheets. Some are one-sided with a single copper layer. This layer may be mechanically cut or chemically etched, or areas of the copper layer are laser-cut and removed, leaving conductive tracks or traces that are analogous to the old point-to-point wiring that today is mostly obsolete.
Multilayer boards and those with surface-mount components are far more difficult to diagnose and repair. Furthermore, elevator work is extremely critical because, if an error is made, there is the distinct possibility that a safety interlock will be disabled. The fault could show up shortly after the elevator is put back in service, or could occur days, months or years down the road. That is an unacceptable risk, and it is the rationale for replacing a suspect printed circuit board with a new one supplied by the manufacturer. These boards are assembled in highly controlled environments and are subject to multiple tests before being shipped out. When a replacement board for a legacy elevator is not available, there are firms that specialize in elevator circuit board repair; these companies subject their finished products to rigorous and thorough testing. Even a nearly invisible sliver of solder that bridges adjacent traces can create a hazardous situation. Moreover, in today’s high-frequency environment, any alteration to a circuit-board trace can change its characteristic impedance, giving rise to data reflections, collisions and corruptions.
On the other hand, if you install a new, US$500 circuit board and the elevator still doesn’t work (after all that downtime), the facility managers may be looking for someone to blame. The way out of this dilemma is to bring in the best outside help available. Whatever route is chosen, passenger safety must take priority over economic considerations.
By way of perspective only, we’ll discuss some aspects of circuit board repair, with the understanding that this should be undertaken only by qualified experts. We tend to think that a circuit board within a steel motion controller enclosure is not subject to physical damage. After all, unlike in a radio, which can be dropped, the elevator circuit board is not likely to be cracked, breaking one or more conductive traces. Moreover, in its machine room, with its filtered air supply, conductive dust particles should not compromise the circuitry. But what about over-voltage from nearby lightning or an anomaly in the utility supply?
A good way to start is to consult the manufacturer’s documentation. Frequently, schematics are on file or may be obtained online along with troubleshooting guidelines. Alternately, the manufacturer may have a good tech help department or engineer who will do a phone consultation.
Of course, visual inspection is often useful. It should be easy to ascertain that the board is powered up. You can look over the board, checking for track discontinuities and charred components. If you’ve done much electronic work, you know how to recognize a failed electrolytic capacitor by its swollen or distorted shape. These components have a shorter life than other capacitors that operate only on signal voltages. Rather than two electrodes (plates) separated by an electrolyte material, the electrolytic layer is formed chemically after assembly when voltage is first applied. Due to the thinness of this layer, the electrolytic capacitor has great capacitance, and it is operated at higher working volts. Consequently, you can expect a shorter life. These components are soldered directly to the circuit board and look like metal cans that tower above the other devices.
Temperature measurements are always revealing. High-end multimeters have temperature probes, and another great way to go — again, assuming that the circuit board is powered up — is to use a digital infrared camera, which instantly reveals hot spots. All functioning microchips should be slightly warm, whereas a hot semiconductor probably has an internal short. A cold semiconductor probably has an internal open circuit. Many devices upon initial failure become noticeably hot for a short time, then turn cold as an internal current path burns out. You can also check input and output voltages with a high-impedance ohmmeter, but for that you’ll need the schematics or the device manufacturer’s data sheet.
Since its design, development and widespread use, circuit board technology has rapidly evolved, permitting greater manufacturing efficiencies and procedures. With surface-mount technology, circuit boards have become thinner and thus require less dedicated area within the enclosures. But closer-spaced components need advanced heat-management techniques, and there are new challenges regarding EMI shielding. More compact, multilevel boards require advanced diagnosis and repair procedures in controlled environments. Technicians performing this work need specialized tools, training and workplace assets, especially in elevator work where there is no room for error.
Nevertheless, as long as board damage is not catastrophic, printed circuitry can be reworked. This generally involves melting down damaged portions of the board and remanufacturing it using appropriate methods and materials. A large part of the process is application of heat, and here the technicians must carefully control its intensity, duration and over what area it is applied. Sufficient heat must be used to melt the solder so that the component can be removed without compromising the board. Portions of the connecting traces may tend to delaminate and lift away from the board or melt back from the through-hole and solder pads. In this event, new material must be placed and electrically and structurally restored.
In repairing a TV or refrigerator circuit board, a certain amount of improvisation can be tolerated, but in elevator work the stakes are far greater. I have seen a cracked TV circuit board with severed conductive tracks repaired by simply soldering in copper jumper wires or connecting the broken ends using alligator clips. That kind of repair may hold up for a couple years if the set is not moved around too much, and if failure eventually re-occurs, the TV will probably be discarded and quickly forgotten. But elevators are not throwaway items. A low-rise Otis elevator rebuild will go in excess of a million dollars, and then two passenger lives are at stake.
Often, the circuit board is not actually damaged, but one or more components has failed. This can be due to latent fault(s) in manufacturing, over-voltage, high ambient heat, vibration or cooling failure. The component can be easily replaced if through-hole mounted, or with greater difficulty in a surface-mount or multilevel board installation. Remember also that the issue may be not the component itself, but in the adjacent circuitry where a shorted blocking diode or faulty power supply has applied too much voltage for too long. Another scenario is when a circuit board trace has become less conductive with age or trauma, a case now of under-voltage. Temperature and voltage measurements will reveal if this is the case. Poor design is a possibility, but we do not expect to see it in an elevator circuit board, where the usual industry standards are invariably exceeded.
The individual conductors that electrically connect components mounted on a circuit board are flat, narrow areas of copper foil left exposed; when adjacent, they are removed by a variety of processes, primarily chemical etching. Width, thickness and length of these printed conductors determines resistance. Consequently, conductance is much less than what we see in point-to-point wiring. Resistance, however, is less problematic than you might suppose because of the very small amount of current drawn by widely used metal-oxide semiconducting field-effect transistors (MOSFETs), especially when used in complementary configuration. Power guzzlers are mounted off-board. Where power and ground planes are used, the traces are wider than the usual signal traces. In fact, in a multilevel board, an entire layer may consist of a thick, solid copper sheet that performs high-current functions such as EMI shielding and ground return.
For high-speed circuits, where serial buses such as CANbus are employed to convey data, circuit-board traces actually become transmission lines in which physical parameters determine characteristic impedance. A mismatch between line and source or load can cause reflections, data loss and compromised communication between the elevator motion controller and the many sensors distributed throughout the installation, notably door interlocks.
Other issues are frequency-dependent impedance and capacitance that, just as parasites, are almost always harmful because the end result is signal attenuation. Sometimes, the attenuation is a deliberate aspect of the design, and characteristic impedance plays an important role. It is for these reasons that, when in circuit-board work, any slight attenuation can disable a safety function or cause an elevator system outage.
Restriction of Hazardous Substances (RoHS) is European Union (EU) legislation that bans, among other things, use of lead in solder. Additionally, all components, boards and complete or partial elevator systems intended for export to the EU must be free of other heavy metals, such as mercury or cadmium. Lead-free solder is compliant, but it is more difficult to use due to its higher melting and fusing temperatures.
Printed circuit board underlayment, the basic board prior to lamination of the copper layers, is manufactured by pressure and heat treating of cloth or paper layers with thermoset resin. The final product must be formed under strict controls to achieve an end product of uniform thickness and other physical properties, including dielectric constant and tensile strength. It is often the size of a sheet of plywood (4 ft x 8 ft) that can be cut to make many circuit boards.
A common underlayment material is woven glass and epoxy (FR-4). It is flame-resistant, which means if heated it releases gases that extinguish fire before it spreads. FR stands for flame retardant. To be compliant, the material must pass UL 94, a vertical flame test. FR-4 will not absorb water. It is widely used as an electrical insulator and in relays, switches, standoffs, bushings, washers, arc shields, transformers and screw-terminal strips due to high strength and excellent electrical characteristics in a damp environment. In through-hole construction, the high strength and abrasive quality causes rapid drill-bit wear and breakage, an important rationale for surface-mount technology.
Printed circuit board manufacturing, from initial design to final product, consists of many complex operations, but for medium to large production runs or high-value products, such as aircraft and elevator motion controllers, it makes sense, especially when you consider point-to-point wiring as the alternative.
Early in the design phase, fabrication data is generated by computer-aided design based on component information. Computer-Aided Manufacturing (CAM) verifies data-based input of fabrication data. The output of digital tooling, including copper patterns, drill files and inspection procedures, is developed. Panelization consists of the process in which multiple printed circuit boards are laid out and cut from large panels.
A protective mask is affixed to the copper foil surface. Then, etching removes the unwanted copper that is not protected by the mask. A laser may be used rather than the photomask. An alternative is printed circuit board milling, performed by a specialized milling machine, or the unwanted copper can be removed by laser.
Before and after the printed circuit board has been populated with through-hole and/or surface-mount components that are soldered in place, either manually or automatically (often by wave soldering), a final, highly critical stage in the manufacturing occurs: testing.
By way of preparation, before components are mounted, bare-board testing ascertains that the traces have no shorts or opens. Where the size or value of the production run warrants the extra expense, a “bed of nails” fixture contacts specified copper lands on the board, and continuity tests are performed. Shorts can consist of errant specks of solder bridging adjacent tracks; in this situation, opens are discontinuities.
After components have been soldered in place, power-off and power-on tests are conducted. Finally, with power applied, a functional test ascertains that all operational criteria are met. Printed circuit boards that fail any of these tests require desoldering, replacement of defective components and retesting. In critical applications, such as aircraft and elevator systems, the testing is extensive and redundant to ensure that there will not be an in-service failure.
Learning-Reinforcement Questions
Use the below learning-reinforcement questions to study for the Continuing Education Assessment Exam available online at elevatorbooks.com or on p. 124 of this issue.
Five Open-Ended Questions:
- How can a printed circuit board fail?
- What are the steps in printed circuit board fabrication?
- How are the traces created?
- What causes short circuits in a circuit board?
- What are the steps in circuit board testing?
Get more of Elevator World. Sign up for our free e-newsletter.


